


As recording and microphone technology has changed and evolved over the past 70 years, perhaps no instrument has seen a change in approach as drastic as the drum set. Originally limited by the number of mixer inputs and available tracks, drum recording setups have grown from a single mono microphone in the ‘40s through the early ‘60s to, in some cases, more than 20 in modern recording studio setups.
In an age of unlimited track counts and an abundance of extremely affordable, high-quality microphones, it would be easy to always use the maximum number of mics at all times. To save you from that decision paralysis, we partnered with the team at Gold-Diggers Sound in Los Angeles to demonstrate three different drum miking techniques. While each approach was born of a certain time period, they all have validity today.
Mono Drum Miking
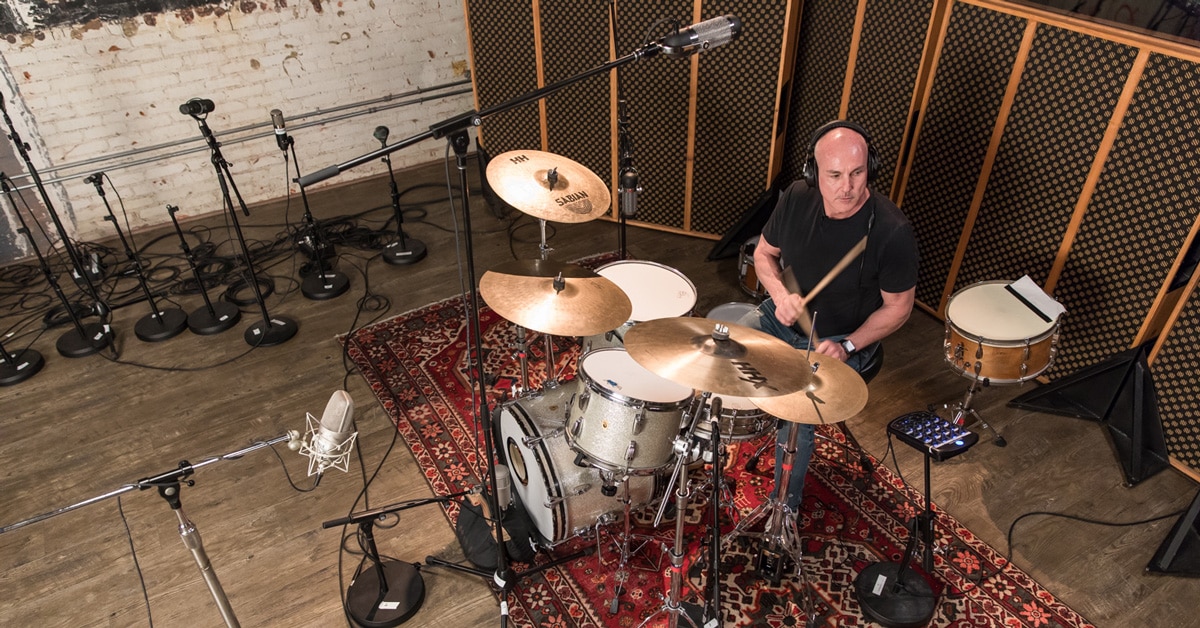
In the example below, Dave Trumfio and Eric Gorman of Gold-Diggers explain a standard approach to mono miking a drum set. Utilizing a Neumann M 149, they focus on the importance of mic placement to get an overall sound of the entire kit. Focusing on proper placement in your studio space will allow you to capture the drummer’s dynamics and performance as accurately as possible.
In this particular example, the M 149 is set to a cardioid pickup pattern, which allows you to focus on the drum kit itself, without picking up too much sound from the rear of the mic. This will result in a tighter drum sound, with less room sound.
Late-60s Drum Miking
As recording technology evolved into the late ‘60s, engineers suddenly found themselves using recording consoles with more inputs, and multi-track tape machines offering upwards of eight individual tracks. This allowed for the use of multiple microphones when capturing drums, whether recording live with an ensemble, or in isolation.
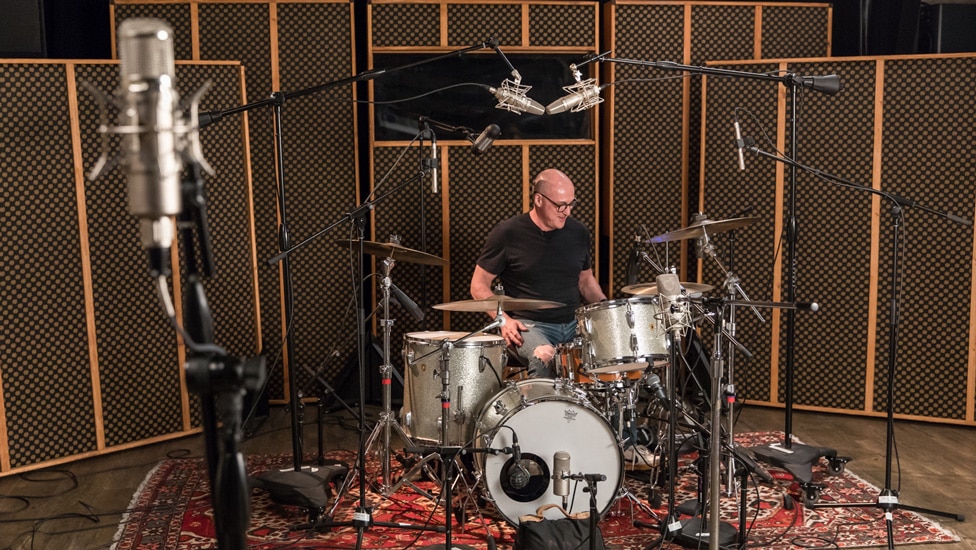
In this particular example, modeled on the famous drum recording technique of iconic engineer and producer Glyn Johns, the Gold-Diggers team went with a 5-mic setup, keeping the Neumann M 149 at the front of the kit. Rather than use condensers for the full kit, AEA R84 ribbon mics were used for the floor tom and overhead, a Neumann U 47 FET was put in front of the bass drum, and a Shure SM57 was used on the snare.
Modern Drum Miking
Moving up to a more modern approach, Dave and Eric demonstrate how you can use 20+ microphones to capture every nuance and detail of the drum kit, while also capturing the sound of the room you’re recording in.
Close Miking The Drums
One of the biggest benefits that modern recording technology affords an engineer or producer is the ability to capture each drum from multiple angles and distances. It is quite common for snare and toms to have both top and bottom microphones, allowing you to capture both the initial attack and the full-bodied resonance of the drum.
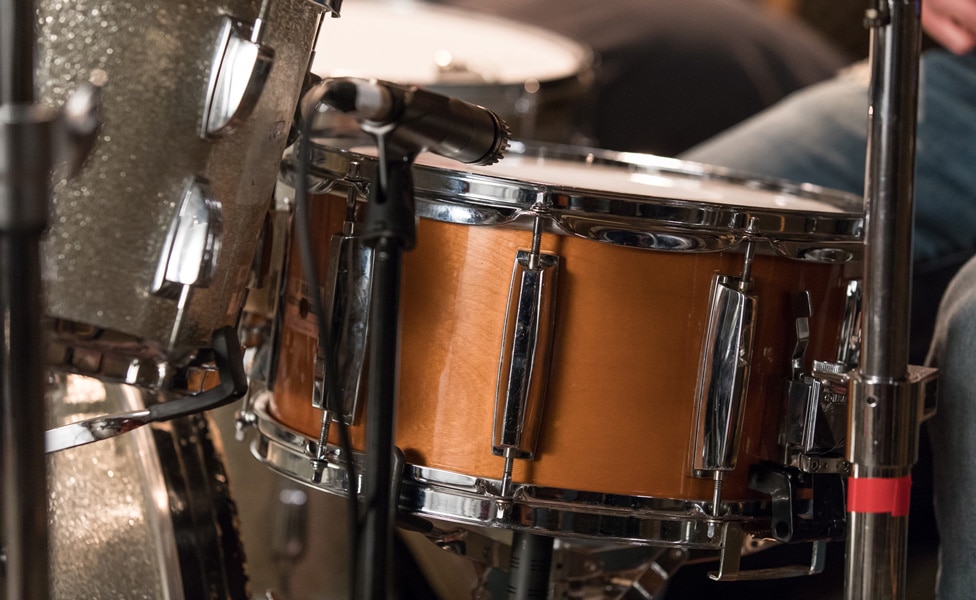
To record the snare drum, the Gold-Diggers team utilizes a Shure SM57 on the top and a Beyerdynamic M 201 for the bottom. They demonstrate each microphone in isolation, as well as the combined sound when mixed together. By blending the two microphones, you get the initial attack of the transient, as well as the crack and rattle of the snares. The result is a big, powerful snare sound that will cut right through a mix. As they explain in the video, you need to be mindful of phase considerations, as phase cancellation can result in significant loss of tone.
Moving to the toms, Dave and Eric choose to use Sennheiser MD 421s on the top, perhaps the most commonly used tom mics on the market. For the bottom they used Shure SM58s. Utilizing both microphones allows them to capture the sound of the stick on the head, as well as the full, deep sound of the toms.
To capture the bass drum, they keep the Neumann U 47 FET out in front, while placing an AKG D112 on the inside. This allows them to capture both the click of the beater and the boom of the drum.
Additional Close Miking
If you’re looking to dial in your sound even further, Dave and Eric’s modern setup utilizes two additional spot mics, a Shure SM7B on the hi-hat and a Beyerdynamic M 160 slightly above the bass drum rim, pointed at the drummer.
The Shure SM7B is utilized to give you additional control of your hi-hat sound. Considered an “SM57 on steroids”, the SM7B picks up a lot of detail on the hi-hat without being overly bright or dark. In addition to adding detail to your sound, this mic will provide you additional control over where the hi-hat sits in your stereo image.
The second mic, the Beyerdynamic M 160, is a great choice if you’re looking to add a little grit to your drum sound. Placed slightly above the rim of the bass drum, when processed through a compressor, this particular mic placement will give you a trashy, aggressive sound. In addition to filling out your sound, it can provide a bit of “glue” for your drum mix.
Overhead Miking
Rather than relying on a single pair of overheads, this modern miking setup includes five different mics, split up over two matched pairs and one mono source.
First, a pair of Neumann U87s are setup in an X-Y configuration, centered directly over the drum set, capturing the full sound of the performance. These are supplemented by two spot mics, a pair of AKG C451s, which are placed closer to the individual ride and crash cymbals. Finally, an over-the-shoulder AEA R84 ribbon mic, pointed towards the snare, captures the drummer’s perspective. Mixed together, this provides a full sound with a wide stereo image.
Setting Up Your Room Microphones
While our techniques have so far addressed relatively close miking techniques, to capture the sound of the live space at Gold-Diggers, the team set up two pairs of room mics and one hallway mic.
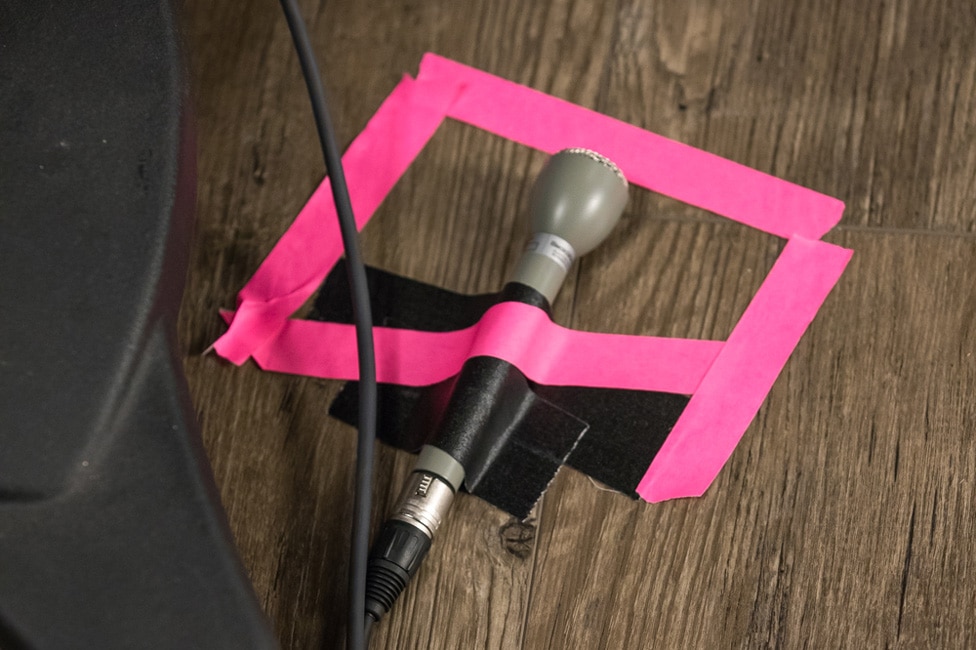
The first room pair involves two omnidirectional Electro-Voice 635A’s taped to the floor, pointed towards the drums. This particular setup provides a lot of low-frequency character in the room, picking up some of the rumble and reflections of the floor. Conversely, Dave and Eric setup a pair of 47-style condenser mics, pointed away from the kit. This will provide a greater sense of the room, picking up various reflections from the space.
Finally, for one more option, the team set up a 251-style microphone in the hallway between the live room and the control room. This mic provides a large, slightly trashy sound. Additionally, by varying how much the door to the hallway is opened, Eric and Dave are able to impact the delay time of this mic.
A Full Mix
Ultimately, the modern miking approach outlined above should provide a great deal of mixing flexibility. No matter how many mics you use and how you choose to mix them, this approach will yield any number of sounds. Just remember, you’ll need to keep an ear out for phase issues!
Which Drum Mic Technique Is Best?
We’ve just covered three very popular approaches to drum miking. So, which is best? Consider your drums, your drummer and the space you’re working in. Think about the final sound you hear in your head and which technique will best get you there.