Capturing a great vocal performance can make or break a song’s impact. Too often, though, the vocal sound gives away the fact it was captured and mixed under less than ideal circumstances.
Here are a seven tips and techniques that can give your vocals professional sparkle, even if you’re working in a less than optimal home studio.
Mellow Your Vibe
Cutting vocal tracks can be both emotionally and physically taxing. Get your voice in shape beforehand and avoid late-night partying. Come to the session with an open mind, but also have a preliminary sense of what the song needs from you. And whether you’re using an expensive, high-end studio or recording in your bedroom, aim to keep things light and flowing. Checking egos at the door helps hugely.
The key here, as with all recording challenges, is to use your ears critically. Before trying various room treatments, make a recording of your performance in the space as it is. Then you will have a baseline to compare with as you try addressing your acoustics issues. If you have a dedicated space for recording, installing permanent acoustic treatment materials like those made by Auralex and Primacoustic makes sense. Even a small stand-mounted reflection filter or isolation vocal shield can improve vocal capture significantly.
Acoustic Treatment Is Your Friend
Even if you’re recording in a walk-in closet or bathroom, there are simple steps you can take to tone down unwanted resonances and reverberations. Using software (more on that in a bit) you can also add “air” back in environments that are, like that closet, acoustically dead. Simply placing sound-absorbing blankets or duvets over reflective surfaces can make a big difference.
The key here, as with all recording challenges, is to use your ears critically. Before trying various room treatments, make a recording of your performance in the space as it is. Then you will have a baseline to compare with as you try addressing your acoustics issues. If you have a dedicated space for recording, installing permanent acoustic treatment materials like those made by Auralex and Primacoustic makes sense. Even a small stand-mounted reflection filter or isolation vocal shield can improve vocal capture significantly.

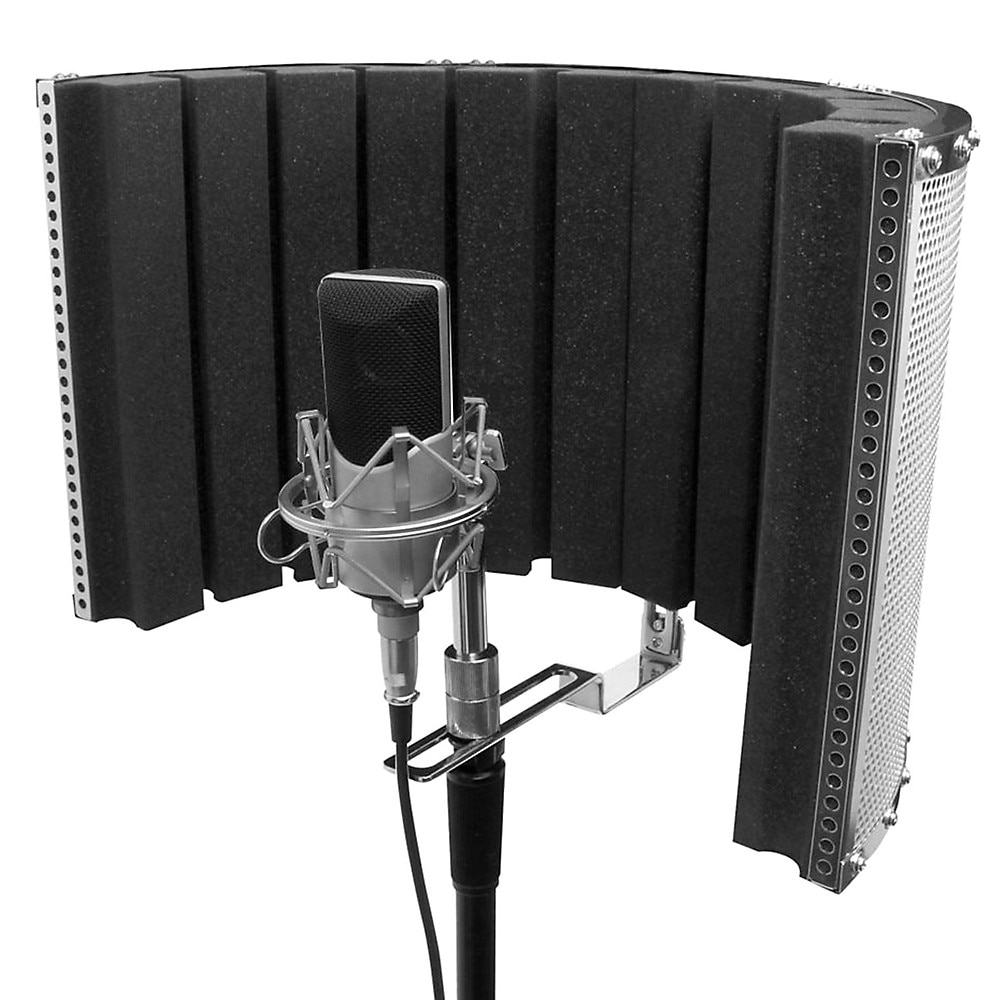
The On-Stage Stands ASMS4730 Isolation Vocal Shield , is lightweight and portable, offering 2" of acoustic foam treatement on a vented aluminum surround panel.
Choose The Right Microphone
Let’s get this out of the way up front: when it comes to finding the right mic for a given voice and song, there are no hard and fast rules. That said, there are some general guidelines that can help arrive at a shorter list of mic models to experiment with. These rules of thumb include:
- Large-diaphragm condenser microphones typically capture more subtle vocal details than dynamic mics and thus tend to be more popular for studio recording work
- Every voice has its own unique character—its timbre. Similarly, each microphone has its own sonic character determined by its frequency response profile, polar pattern and capsule. Finding the best match between singer and microphone involves plenty of experimentation among various mic models. The good news for home and project studio owners is that the selection of mics available to such users today has grown enormously. The introduction of many modestly priced large-diaphragm condenser mics has put pro-quality vocals in reach of budget-strapped musicians.
- Choosing the right polar pattern for your voice and your recording environment can influence your vocal sound greatly. Here again, critical listening and testing is essential. Generally, mics with cardioid pickup patterns yield the best results on vocals by excluding off-axis sounds. However, if the room is acoustically dead, an omnidirectional mic can sometimes add necessary "air". Microphones with switchable polar patterns and/or capsules often are a good investment since they can be used on multiple sound sources in a variety of settings.

The Audio-Technica 4047MP, seen here at the 2017 AES Show in Los Angeles, offers some major vintage vibe while offering selectable omnidirectional, cardioid, and figure-8 polar patterns.
Master Your Mic Technique
Although various mics handle loud sources differently, it’s almost never a good idea to ”eat the mic” by placing your mouth right up to the grille. Doing so produces proximity effect—the phenomenon whereby the bass content of the signal increases as the source draws closer to the mic. While most singers are looking for lots of warmth in the low and mid frequencies, eating the mic is counterproductive because it ruins the track’s punch and clarity. And in worst cases, you will overwhelm the mic’s sound pressure level handling capability resulting in unpleasant distortion that will be very difficult if not impossible to clean up in the mix.
At the very least, you’re likely to produce loud sibilance and plosives that can be tricky to remove from the final mix. Often, close-miked vocals are an attempt to overcome poor acoustics in the room. Stand-mounted microphone windscreens and pop filters can help eliminate these problems while also physically keeping the vocalist at a controlled distance from the mic. In most cases, pointing the mic’s capsule slightly off-axis to the singer’s mouth will also help minimize pops and sibilance while also producing a more level signal.
And remember to decouple your mic from the floor to avoid rumble in your recording. Using suspension shock mounts on mics and shock-absorbent material such as rubber isolation pads under mic stands solves this problem.

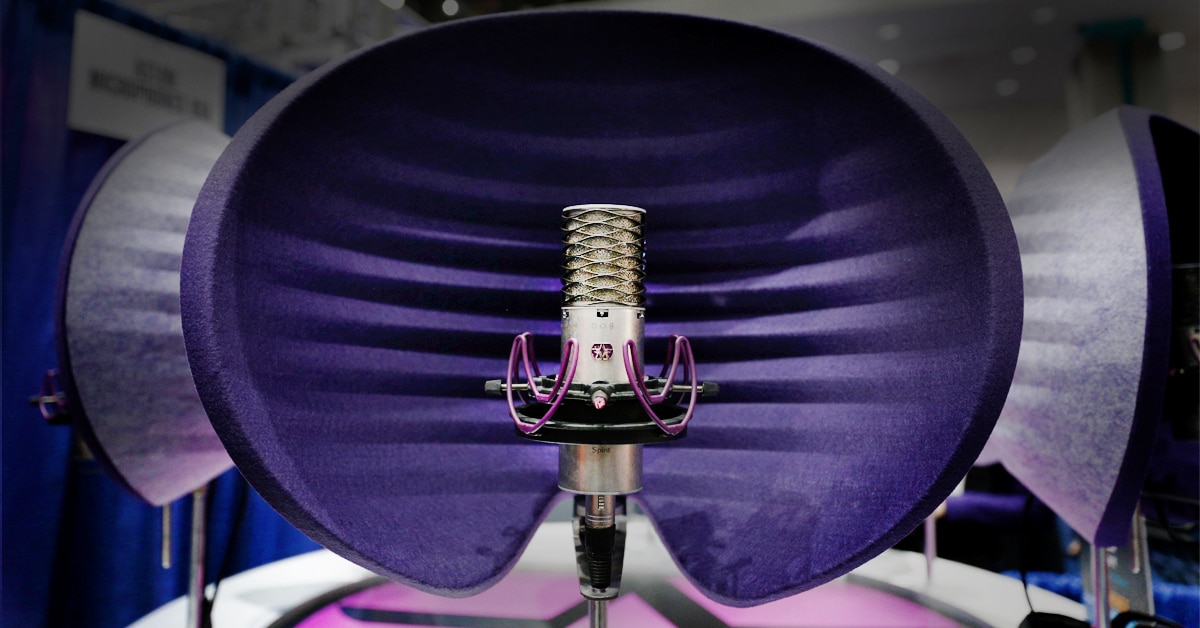
Looking for the total package? Here's the Aston Microphones Spirit, a multi-pattern condenser, Rycote Custom Shockmount and HALO Reflection filter.
Pick Good Headphones To Monitor With
Be sure to use a pair of good-quality closed-back headphones to monitor your performance as well as backing tracks and musicians. Note, open back headphones will allow the monitor mix to bleed into live mics, muddying the overall sound, and potentially making the job of the mix engineer much harder. Many singers prefer to have a little reverb added to their monitor mix as the naked, dry signal of their voices can undermine their confidence. A judicious amount of reverb tends to disguise minor flaws in the singer’s voice and performance. Exactly how much reverb should be used can be left to the vocalist to decide since the affected signal won’t be sent to the recorder.
Compress Your Vocals
Although it’s not within the scope of this article to get into compression in great depth, there are a few general principles to observe.
Many music producers insist that vocals should be recorded completely dry with sweetening only added in the mixdown stage. That is the ideal. However, when dealing with vocalists whose performance is full of peaks and valleys in terms of dynamics a little compression up front can be a big help. Luckily, there are plenty of software and hardware solutions for this. You might consider placing a good hardware compressor between your mic pre and your recording interface of choice. Try applying a compression ration of 3:1 or 4:1 to level out peaks that would otherwise cause clipping in the signal chain.
Give Your Vocals Some Magic
This is where modern DAWs and other specialized digital audio tools can really help vocals shine in the final mixdown. Digital processing can’t fix a lousy performance, but it can fix a lot of vocal track deficiencies. And of course, DAWs allow you to combine multiple vocal takes into one final version that uses the best parts from each take.
Let’s look at a few other software-based effects processing possibilities.
Use an application such as Auto-Tune by Antares to pull wayward vocal pitches into tune if performances are shaky pitch-wise. Some programs such as Celemony Melodyne allow you to make note-by-note edits that sound perfectly natural. And speaking of keeping it natural, it’s usually best to use the slowest possible pitch-correction settings.
When dealing with equalization, there are no rules since each rough mix and recording environment presents its own unique challenges. But again, a few rules of thumb: If the recording sounds boxy due to a poor recording environment, try reducing or removing levels in the 150 - 400 Hz neighborhood. A wide ranging boost in upper frequencies, say above 8 kHz, can help add sheen, but go easy to avoid an unnatural-sounding mix.
Reverb added in the mixing stage can add back a little space and magic to vocals. Sometimes applying two different reverbs such as plate and convolution types (when you’re looking for a very specific space), then balancing their effects can add a very pleasing shimmer to vocals. It can also help make a vocal “sit” a little better, tying your mix together like a good rug in a room.
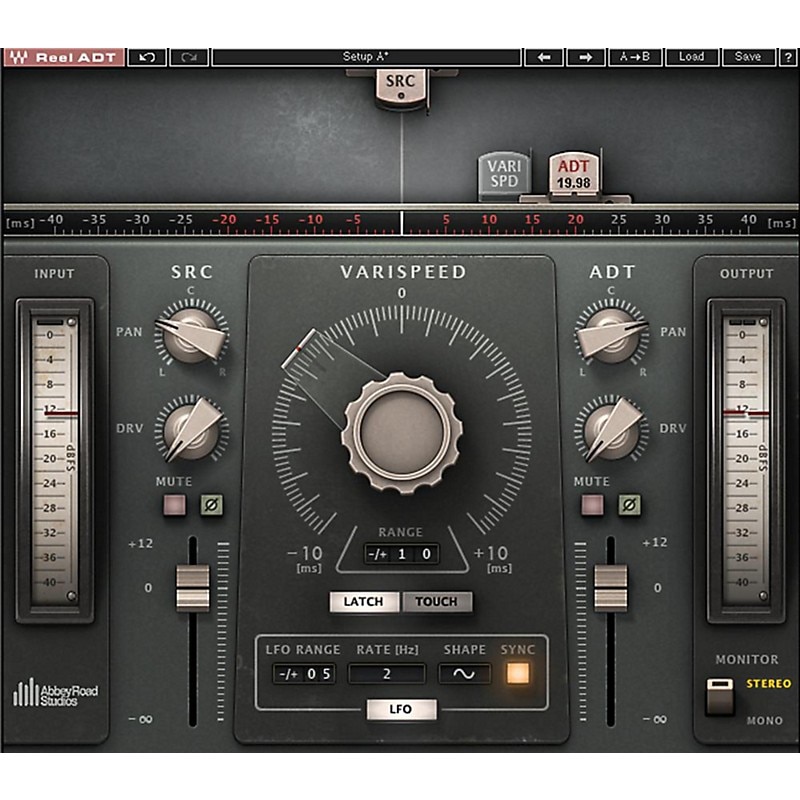
Similarly, double-tracking vocals can boost a performance greatly, particularly when the singer doesn’t have a lot of projection. There are some great plugin options out there, such as Waves Reel ADT, but you may also want to experiment with the sound you get from actually doubling the performance on a second track.

With its authentic modeled valve tape machine sound and faithful emulation of wow and flutter, Waves/Abbey Road Reel ADT can enhance any track with the impression of two separate takes.
In applying compression to the final mix, try using around 6 -8 dBs of gain reduction with a ratio of between 2:1 and 6:1 on the loudest passages. To judge the vocal level in the overall mix, try listening to it from an adjoining room. The voice should be easily distinguishable but still sound like an integral part of the recording.
Keep in mind that there is no substitute for critical listening. The advice given here on compressing and EQing vocals are just intended as starting points. Be careful in correcting dynamics that you don’t suck the life out of your recording. When adding sweetening, don’t overdo things to the point that the track sounds synthetic (unless that’s your aim).
To dig deeper into using a compressor, read How to Set a Compressor for Voice and Instruments.
Ready to upgrade your vocal sound? Call a Musician’s Friend Gear Head at 800-449-9128 for expert, friendly advice.


